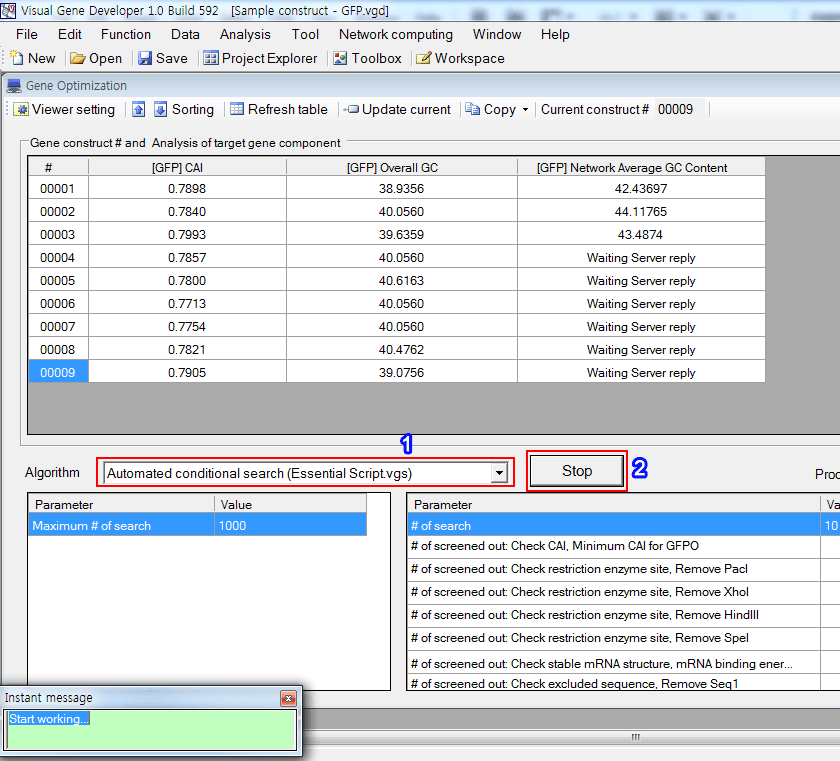

Network and multi-threaded computing
o Module development and gene analysis
Example 1:
Develop a customized module supporting network/multi-threaded computing and then use the module to calculate average GC content at 1st and 3rd places.
Step 1: Develop module
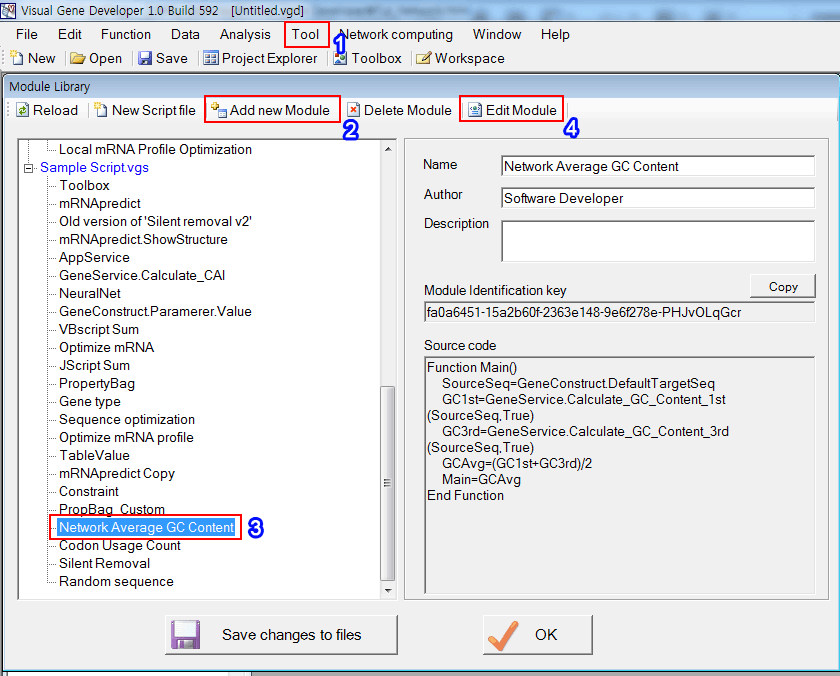
1. Click on the 'Module Library' in the 'Tool' menu
2. Click on the 'Add new Module'
3. Or just choose 'Network Average GC Content'
4. And then click on the 'Edit Module'
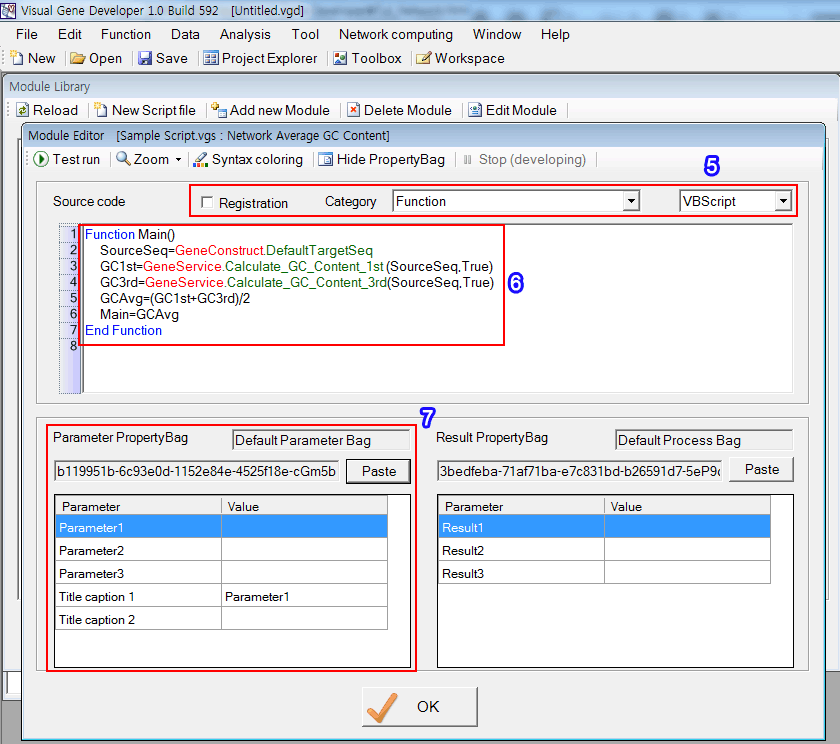
5. Set the parameters
6. The source code was shown
7. We will replace the current PropertyBag with custom PropertyBag
Step 2: Develop PropertyBag
You can design a new PropertyBag that has a 'Network computing' as an essential parameter. However, we skip the design step and demonstrate how to import designed PropertyBag.
1. Click on the 'Property Bag Library' in the 'Tool' menu
2. Choose 'Default Network Computing'
3. Click on the 'Copy' button
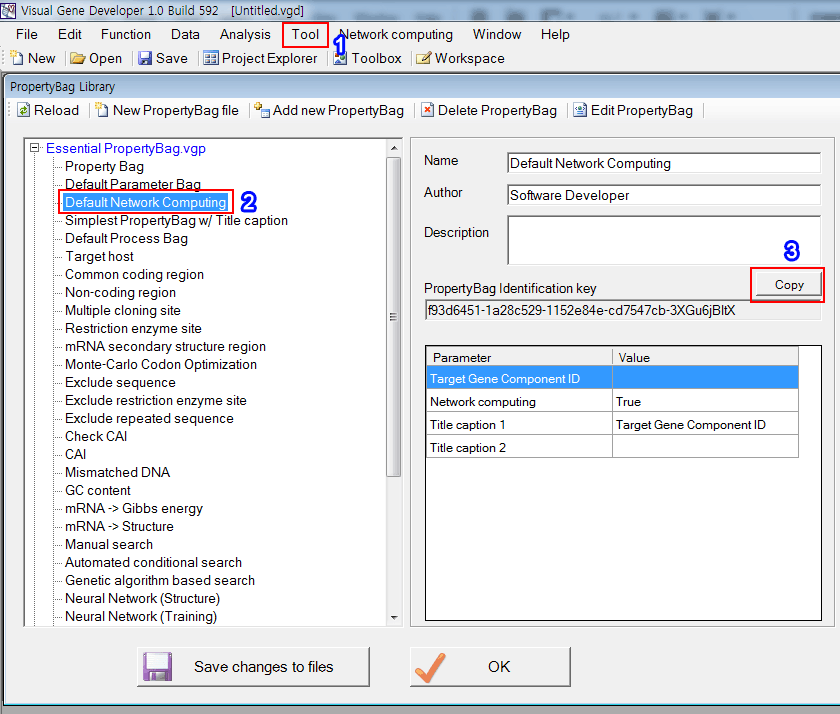
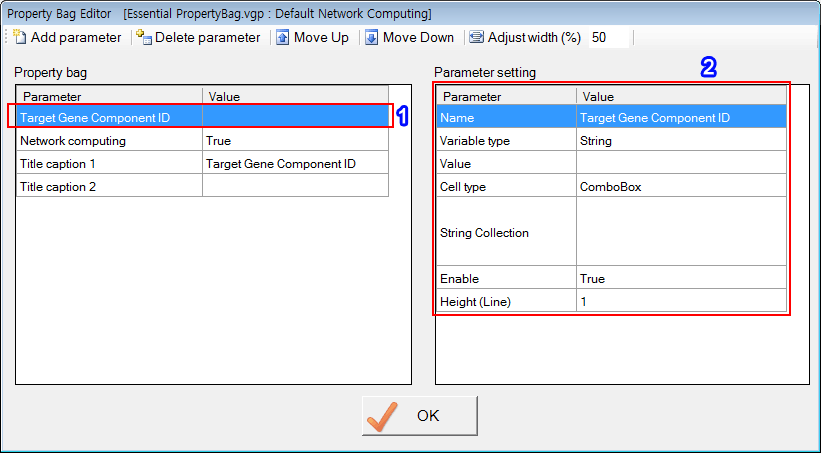
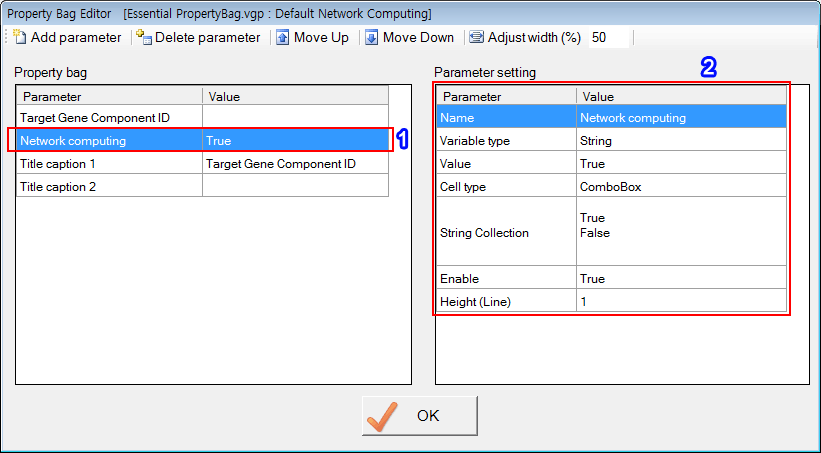
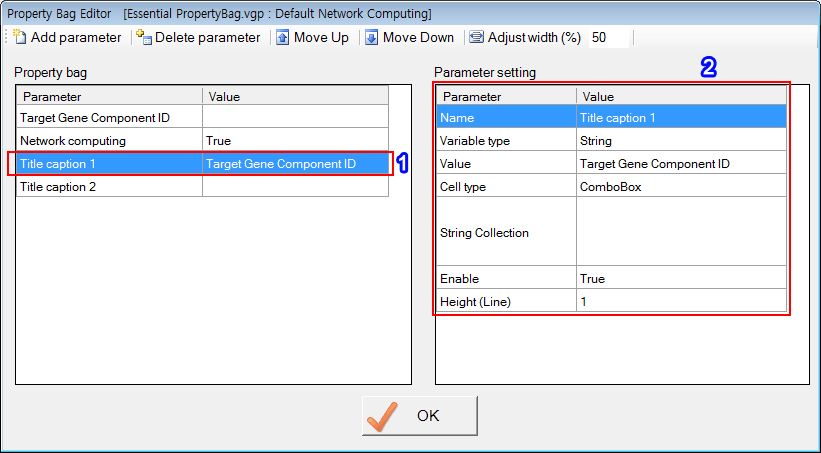
* Because the Visual Gene Developer doesn't allow a user to modify or see the content of the PropertyBag (Default Network Computing) in the 'Essential PropertyBag.vgd', we show it in the below.
'Target Gene Component ID', 'Network computing', 'Title caption 1' and 'Title caption 2' are reserved names that have special functions. Of course, users can use those reserved names when defining PropertyBag.
The first parameter
The second parameter
The third parameter
Step 3: Attach PropertyBag to Module
1. Copy 'PropertyBag Identification Key' in the 'PropertyBag Library' window (see Number 3 in Step 2)
2. Click on the 'Paste' button. Immediately, you can see the imported PropertyBag
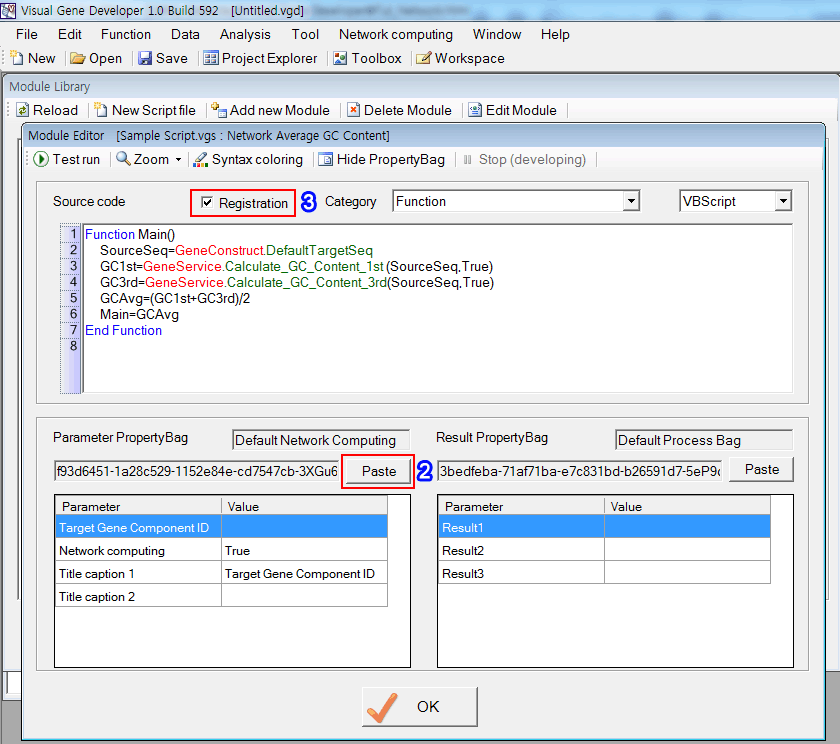
3. In order to register the module, check on the 'Register'.
Very important!
1. "Network computing" is a reserved name for network & multi-threaded computing. You must use this reserved name.
2. Regarding network computing, there is an important limitation: You can not access to entire gene construct but can retrieve sequence data via "GeneConstruct.DefaultTargetSeq" on the client-side. It is because that the Visual Gene Developer' server doesn't transfer the entire gene construct information to clients. It transfers only the target sequence. Therefore, you must use "'GeneConstruct.DefaultTargetSeq" to develop modules that support network & multi-threaded computing.
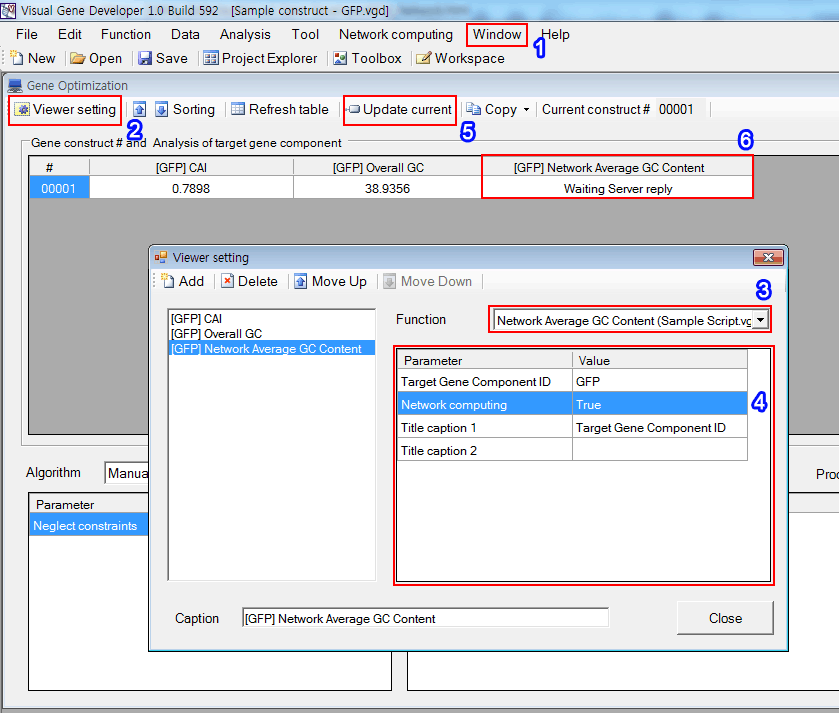
Step 4: Set 'Gene Optimization' window
1. Click on the 'Gene optimization main window' in the 'Window' menu
2. Click on the 'Viewer setting' button
3. Choose algorithm: Select 'Network Average GC Content (Sample Script.vgs)'
4. Adjust parameters as shown in the box
5. Click on the 'Update current'
6. You can see a new column titled '[NAME] Network Average GC Content' that has a value of 'Waiting Server reply'
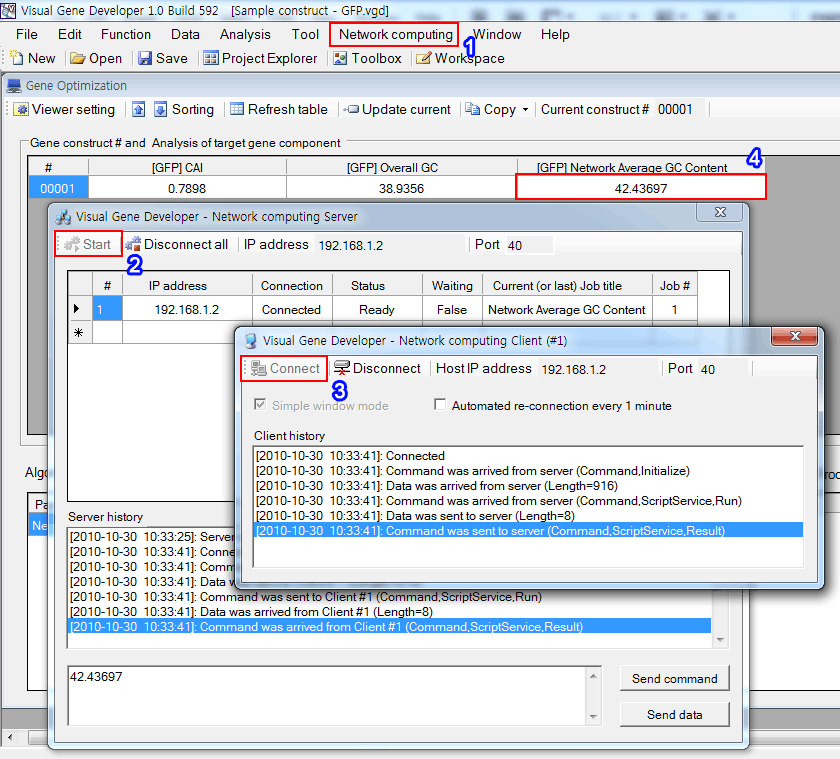
Step 5: Activate Server and Clients
1. Click on the 'Server window' in the 'Network computing' menu
2. Click on the 'Start' button
3. Click on the 'Add Client' in the "network computing' menu and then click on the 'Connect' button
4. The cell will be immediately updated.
Step 6: Execute module
1. Click on the 'Automated conditional search' in the 'Gene optimization' window
2. Click on the 'Run' button. The Visual Gene Developer will update every cell and replace the 'Waiting Server reply' with calculated values.
At the same time, you can monitor the current status in the 'Job list' window. Just click on the 'Job list' in the 'Network computing' menu
